I
don't have the greatest memory. Birthdays? Forget it. The big snow
storm of 2008? Clueless. What I did yesterday? Give me a minute. But
when it comes to food memories, I can spew out more details than anyone
cares to hear.
For example, in 1998 my
mother, sister and I were in England during a 6-week European
adventure. In addition to visiting the Beatrix Potter museum in the Lake
District and the home of James Herriot (author of "All Creatures Great
and Small"), our to-do list included a proper afternoon tea in London.
I'll never forget it.
My mom was up front ordering while my sis and I grabbed a table. Nearby,
a little 5 or 6 year old English boy, outfitted in knee-high socks and
dress shorts, was looking us up and down. He was sitting on a bench
swinging his little legs when, apropos of nothing, he proudly announced
in the most adorable British accent, "I'm having the toasted cheese." I will always think of this when I eat a grilled cheese sandwich.

Grilled
cheese is a simple comfort food that both children and adults enjoy
immensely. While the dish is uncomplicated, it's surprising how many
competent cooks admit having a hard time getting it right. Most often
this means charred bread. The good news is that scraping the blackened
bits off with a knife is a thing of the past. With the correct technique
and a little patience, you can serve up perfect, glorious grilled
cheese sandwiches every single time.
The
number one rule is that the heat needs to be lower than you think. The
whole point is to end up with a golden, buttery exterior and an oozy,
melted interior, a process that simply cannot be rushed. Number 3 (a
solid medium-low) on the stove dial is just right.
Secondly,
I find that putting a weight on top allows for even heating and ensures
that the cheese melts properly. I use a simple piece of aluminum foil
and an empty pot.

Like I said, it's all about the technique. Here's how I do it:
Heat a cast iron
skillet over medium-low heat. In the meantime, assemble your sandwiches
using good bread, sliced cheeses and any other fixins' that strike your
fancy. For the sandwiches pictured here, I used raw Cheddar, summer
tomatoes and basil from the garden. Swirl some butter in the bottom of
the skillet. Place the sandwiches in the pan, cover loosely with a piece
of aluminum foil and top with a pot that's large enough to press the
sandwiches evenly (a baking dish would also work). Let the grilled
cheese cook until the bottoms are perfectly golden brown, 4-6 minutes.
When you lift each sandwich to flip, swirl a little more butter
underneath (don't be skimpy). After flipping the sandwiches, there's no
need to continue covering and weighing them down. Cook on the other side
until golden, about 3 minutes.
Unless you'd like to cut them, you can now ditch your knife since no scraping will be required.
Every year over the holidays my mom and I watch The Sound of Music and, subsequently, get the songs stuck in our heads for weeks. I always enjoyed the scene where Maria calmed the children by singing about her favorite things, but I have to admit, my lyrics would be a heck of a lot different than whiskers on kittens and cream colored ponies:
“Thin New York pizza and dry apple cider
Custard-filled cream puffs and wine by the fire…”
Ok, Tristan said I have to stop before everyone knows that I'm a dork. But if I were allowed to continue, I would certainly work savory pancakes in there. Zucchini, sweet corn, green pea, you name it. But the love ends at the standard buttermilk flapjack. I like the idea of ordering a piping hot stack but they're just too starchy and inevitably leave me feeling 10 pounds heavier.
That said, I recently had an inexplicable hankering for sweet pancakes, and my cravings don't go away until they're satisfied. To avoid the infamous flour-induced coma, I decided to make a version using yogurt, lemon zest and whipped egg whites. The result? Seriously fluffy, light-as-a-feather, uncommonly good pancakes.
The key here is separating the egg yolks from the whites. You could easily skip this step (simply mix whole eggs into the yogurt) but you'd be missing out on some incredible texture. Folding in whipped egg whites produces a batter that's impossibly airy and delicate.
Requiring only 7 tablespoons of flour per batch, these lemony little cakes will simultaneously satisfy your pancake craving and perpetuate it.
Lemon Yogurt Pancakes
A lighter version of the American breakfast classic, these are made with yogurt instead of milk and a bit of lemon zest for freshness.
Makes 14 3-inch pancakes
1 cup plain yogurt (I use organic whole milk yogurt)
2 large eggs, divided
Zest of one lemon
1/2 teaspoon vanilla extract
7 tablespoons all purpose flour
1 tablespoon sugar
1 teaspoon baking soda
1/2 teaspoon salt
In a medium bowl, whisk together the yogurt, egg yolks, lemon zest and vanilla. In a small bowl, stir together the flour, sugar, baking soda and salt. Add the dry ingredients to the wet and stir until just combined (do not over-mix).
Using an electric mixer beat the egg whites on high speed until stiff peaks form. Gently fold the egg whites into the batter, being careful to retain as much air as possible.
Heat a cast iron skillet or griddle over medium-low heat (err on the side of lower heat to avoid burnt outsides and raw middles). Add enough melted butter to lightly coat the bottom of the pan - you can do this by brushing, swirling or, as I do, running the end of a stick of butter over the pan's surface. Pour in the batter in scant 1/4-cup-fulls. Cook for 2-3 minutes or until bubbles appear on the surface. Flip carefully and cook another 1-2 minutes. Repeat with remaining batter.
Serve in a stack with butter, yogurt and real maple syrup.

If you're already thinking that a baguette seems too complicated, let me assure you that there are no fancy gadgets or special equipment involved. If you have a mixing bowl, two hands and a regular old baking sheet, you're set.
The dough itself is very straightforward: flour, salt, yeast and water. But the trick is to begin at least one day in advance so that the flavors can develop during a slow overnight fermentation in the refrigerator.
While I was incredibly pleased with the results, I did learn a couple of things the hard way.
1. When creating the necessary oven steam, do not pour cold water into a searing hot Pyrex dish. It will explode.
2. To cut the épi shape, make each cut in the same fashion down the length of the loaf. The only thing that changes are the alternating directions of the "rolls" (the aesthetics of one of my loaves was sacrificed in order to learn this lesson - but it was still delicious).
This classic recipe (which starts on page 49) produces one of the finest baguettes available, and with minimal effort, which means that you don't need the excuse of a holiday to enjoy it.
It may be the American way but I always felt that serving plain old bread alongside spaghetti was redundant. Don’t get me wrong, if it’s there I’ll eat it but does a boiled heap of white flour really need slices of baked white flour to wash it down? In the case of garlic bread, absolutely.
There’s something about a toasty loaf slathered with melted butter and chunks of real garlic that make it a different animal altogether. And when you add freshly chopped green herbs, it’s anything but redundant.
I served it with the Italian Wedding Soup I wrote about last week and couldn’t help but notice that Tristan polished off three quarters of the loaf. I’d say it was a hit.
Green Herb Garlic Bread
Feel free to use parsley alone or any combination of fresh herbs that you have on hand. It's the perfect accompaniment to soups, stews, salads and yes, spaghetti.
1/2 cup unsalted butter, softened
4 garlic cloves, finely chopped
1/4 cup finely chopped fresh parsley
1 tablespoon finely chopped basil leaves
1 teaspoon kosher salt
1 loaf crusty ciabatta bread or a large baguette
Preheat oven to 350˚F.
In a small mixing bowl, stir together the butter, garlic, herbs and salt.
Slice the ciabatta in half lengthwise and spread each half evenly with the herbed butter. Place cut side up on a sheet pan and bake for 15 minutes.
Sandwich bread back together and cut into slices.
I’m from New York and enjoy a good bagel. There are a few decent ones here in Seattle but none that get me excited. For some reason they haven’t found a way to replicate that chew. So instead of complaining, I decided to try making my own.
I’m the first to admit that baking isn’t my forte but I like a culinary challenge as much as the next guy. After some researching, it appeared that the bagel recipe in Peter Reinhart’s The Bread Baker’s Apprentice is considered the gold standard. It involves making a sponge, an overnight retardation, and then a classic boil and bake preparation. This was definitely a weekend project and, finally last Saturday, the rubber hit the road.

In the same way that I like my pasta doused with sauce, I like my bagels doused with everything -- onion, garlic, sesame seeds, poppy seeds and salt –- and as you can tell from the photos, I didn’t hold back. Feel free to be a bit more conservative with the toppings or leave them out altogether. You could also mix cinnamon and raisins into the dough.
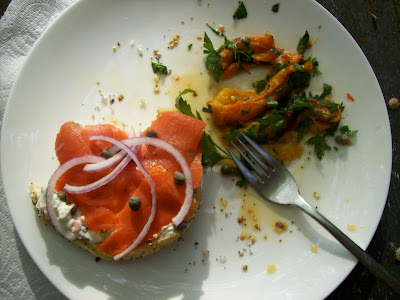
Everything Bagels
Bread flour works best here due to its high protein content. If you don’t have any, simply add 1 teaspoon of vital wheat gluten to each cup of all purpose flour. These are perfect for a weekend project – start them the night before and bake them in the morning. Adapted from The Bread Baker’s Apprentice.
Makes 1 dozen
Sponge:
1 teaspoon instant yeast (or 1 1/2 teaspoons active dry yeast)
4 cups bread flour
2 1/2 cups water
Dough:
1/2 teaspoon instant yeast (or ¾ teaspoon active dry yeast)
3 3/4 cups bread flour
2 3/4 teaspoons salt
2 teaspoons malt powder
OR
1 tablespoon malt syrup, honey or brown sugar
1 tablespoon baking soda for the water
Topping:
3 tablespoons dehydrated garlic flakes
3 tablespoons dehydrated onion flakes
3 tablespoons sesame seeds
3 tablespoons poppy seeds
1-2 tablespoons kosher or sea salt, or to taste
The Night Before:
In a large mixing bowl, stir the instant yeast into the flour. Add the water and stir well. Cover with plastic wrap and allow to bubble and rise for 2 hours. (If you are using active dry yeast, simply sprinkle it over 1/4 cup lukewarm water with a good pinch of sugar. If the yeast is alive, it will begin foaming after about 10 minutes. At this point, add the remaining water and the flour and continue with the recipe).
Remove the plastic wrap and stir in the additional yeast. (This time, if using active dry yeast, simply hydrate it in a touch of warm water before adding). Add 3 cups of the flour, salt and malt powder; mix until all the ingredients come together and form a solid mass. At this point you will need to add the remaining 3/4 cup flour, either by mixing in the bowl or by kneading. The dough will be quite stiff.
Turn the dough out onto a clean work surface and knead for 10 full minutes. It should be smooth and elastic. Divide the dough into 12 even pieces, about 4 ½ ounces each. Roll each piece into a ball and set aside. When all 12 pieces have been rolled, cover them with a damp towel and allow them to rest for 20 minutes.
To shape the bagels, poke your thumb through the center of each ball of dough and rotate (or twirl, in my case) to expand the hole slightly, being sure to keep an even width all the way around. Place the shaped bagels onto two oiled (or parchment-lined and lightly sprayed with oil) sheet pans, leaving a bit of space between them. Cover with plastic wrap and allow them to rise for 20 minutes. Note: I used a paper towel dipped in oil to lightly brush the tops of the bagels to prevent them from sticking to the plastic wrap.
Peter Reinhart’s method for determining whether the bagels are ready to retard is as follows: drop one of the bagels into a bowl of cold water. If it floats to the surface in under 10 seconds, it is ready to retard. If not, allow it to rise a bit longer. I actually skipped this step and simply allowed them to rise for 30 minutes instead. Cover the bagels with plastic wrap and place them into the refrigerator to retard overnight.
In the Morning:
Preheat oven to 500°F. Put a large pot full of water on the stove to boil. In the meantime, mix the topping ingredients and set aside.
Once the water is boiling, add one tablespoon of baking soda - this supposedly replicates that authentic bagel shop flavor. Drop a few bagels into the boiling water (I could only fit 3 at a time) and allow them to boil for 1 or 2 minutes. Using a large slotted spoon, carefully flip them over and allow them to boil on the other side for another minute or two. Remove and place them back onto the oiled sheet pan (or 2 that are freshly lined with parchment paper and a light coating of oil). Immediately, while bagels are still hot and wet, sprinkle them with the topping mixture, flip over and sprinkle topping on the other side.
When all bagels have been boiled and topped, transfer them to the preheated oven and bake for 5 minutes. Reduce the oven temperature to 450˚F, rotate the pans and bake for another 5 minutes or until bagels are golden brown (mine took another 8-10 minutes). Remove from the oven and let cool.
Vegetable Cream Cheese
Pretty much anything goes here. Try it with chives or dill.
16 oz. cream cheese at room temperature
1 medium carrot, peeled and finely diced
3 green onions, washed, trimmed and thinly sliced
2-3 radishes, finely diced
1 1/2 ribs celery, finely diced
Salt to taste
Pinch of finely ground black pepper
3/4 teaspoon celery seeds, optional
1/2 teaspoon onion powder, optional
Place the cream cheese, carrot, green onion, radish, celery and seasonings in a medium bowl. Using an electric mixer, mix on low speed until blended.

Our friend Talley made Jim Lahey's celebrated No-Knead Bread that was published in the New York Times a few years back. The one that requires a quick mix of flour, water and yeast followed by a long, uninterrupted rest of about 18 hours. I was intrigued when he explained the process (this is the same guy who cures his own bacon and steeps homemade limoncello for 90 days). And the taste! It had a perfectly chewy, crispy crust surrounding an airy, delicate middle. My beautiful plate of turkey, squash and dressing took a back seat while I buttered and ate one, two, three, oh god knows how many slices of bread. It was that good.
Needless to say, we've been making it ever since. The classic version with a cornmeal crust is a trusted standby but I've been experimenting (I've got a loaf coated with sesame salt in the oven this very moment). I'm not exactly an accomplished baker but this no-fuss recipe turns out glorious, miraculous bread every single time.


