Showing posts with label snack. Show all posts

Sunday, August 5, 2012

How to Make the Perfect Grilled Cheese


I don't have the greatest memory. Birthdays? Forget it. The big snow storm of 2008? Clueless. What I did yesterday? Give me a minute. But when it comes to food memories, I can spew out more details than anyone cares to hear.

For example, in 1998 my mother, sister and I were in England during a 6-week European adventure. In addition to visiting the Beatrix Potter museum in the Lake District and the home of James Herriot (author of "All Creatures Great and Small"), our to-do list included a proper afternoon tea in London.

I'll never forget it. My mom was up front ordering while my sis and I grabbed a table. Nearby, a little 5 or 6 year old English boy, outfitted in knee-high socks and dress shorts, was looking us up and down. He was sitting on a bench swinging his little legs when, apropos of nothing, he proudly announced in the most adorable British accent, "I'm having the toasted cheese." I will always think of this when I eat a grilled cheese sandwich.


Grilled cheese is a simple comfort food that both children and adults enjoy immensely. While the dish is uncomplicated, it's surprising how many competent cooks admit having a hard time getting it right. Most often this means charred bread. The good news is that scraping the blackened bits off with a knife is a thing of the past. With the correct technique and a little patience, you can serve up perfect, glorious grilled cheese sandwiches every single time.

The number one rule is that the heat needs to be lower than you think. The whole point is to end up with a golden, buttery exterior and an oozy, melted interior, a process that simply cannot be rushed. Number 3 (a solid medium-low) on the stove dial is just right. 

Secondly, I find that putting a weight on top allows for even heating and ensures that the cheese melts properly. I use a simple piece of aluminum foil and an empty pot.


Like I said, it's all about the technique. Here's how I do it:

Heat a cast iron skillet over medium-low heat. In the meantime, assemble your sandwiches using good bread, sliced cheeses and any other fixins' that strike your fancy. For the sandwiches pictured here, I used raw Cheddar, summer tomatoes and basil from the garden. Swirl some butter in the bottom of the skillet. Place the sandwiches in the pan, cover loosely with a piece of aluminum foil and top with a pot that's large enough to press the sandwiches evenly (a baking dish would also work). Let the grilled cheese cook until the bottoms are perfectly golden brown, 4-6 minutes. When you lift each sandwich to flip, swirl a little more butter underneath (don't be skimpy). After flipping the sandwiches, there's no need to continue covering and weighing them down. Cook on the other side until golden, about 3 minutes.

Unless you'd like to cut them, you can now ditch your knife since no scraping will be required. 


Thursday, June 7, 2012

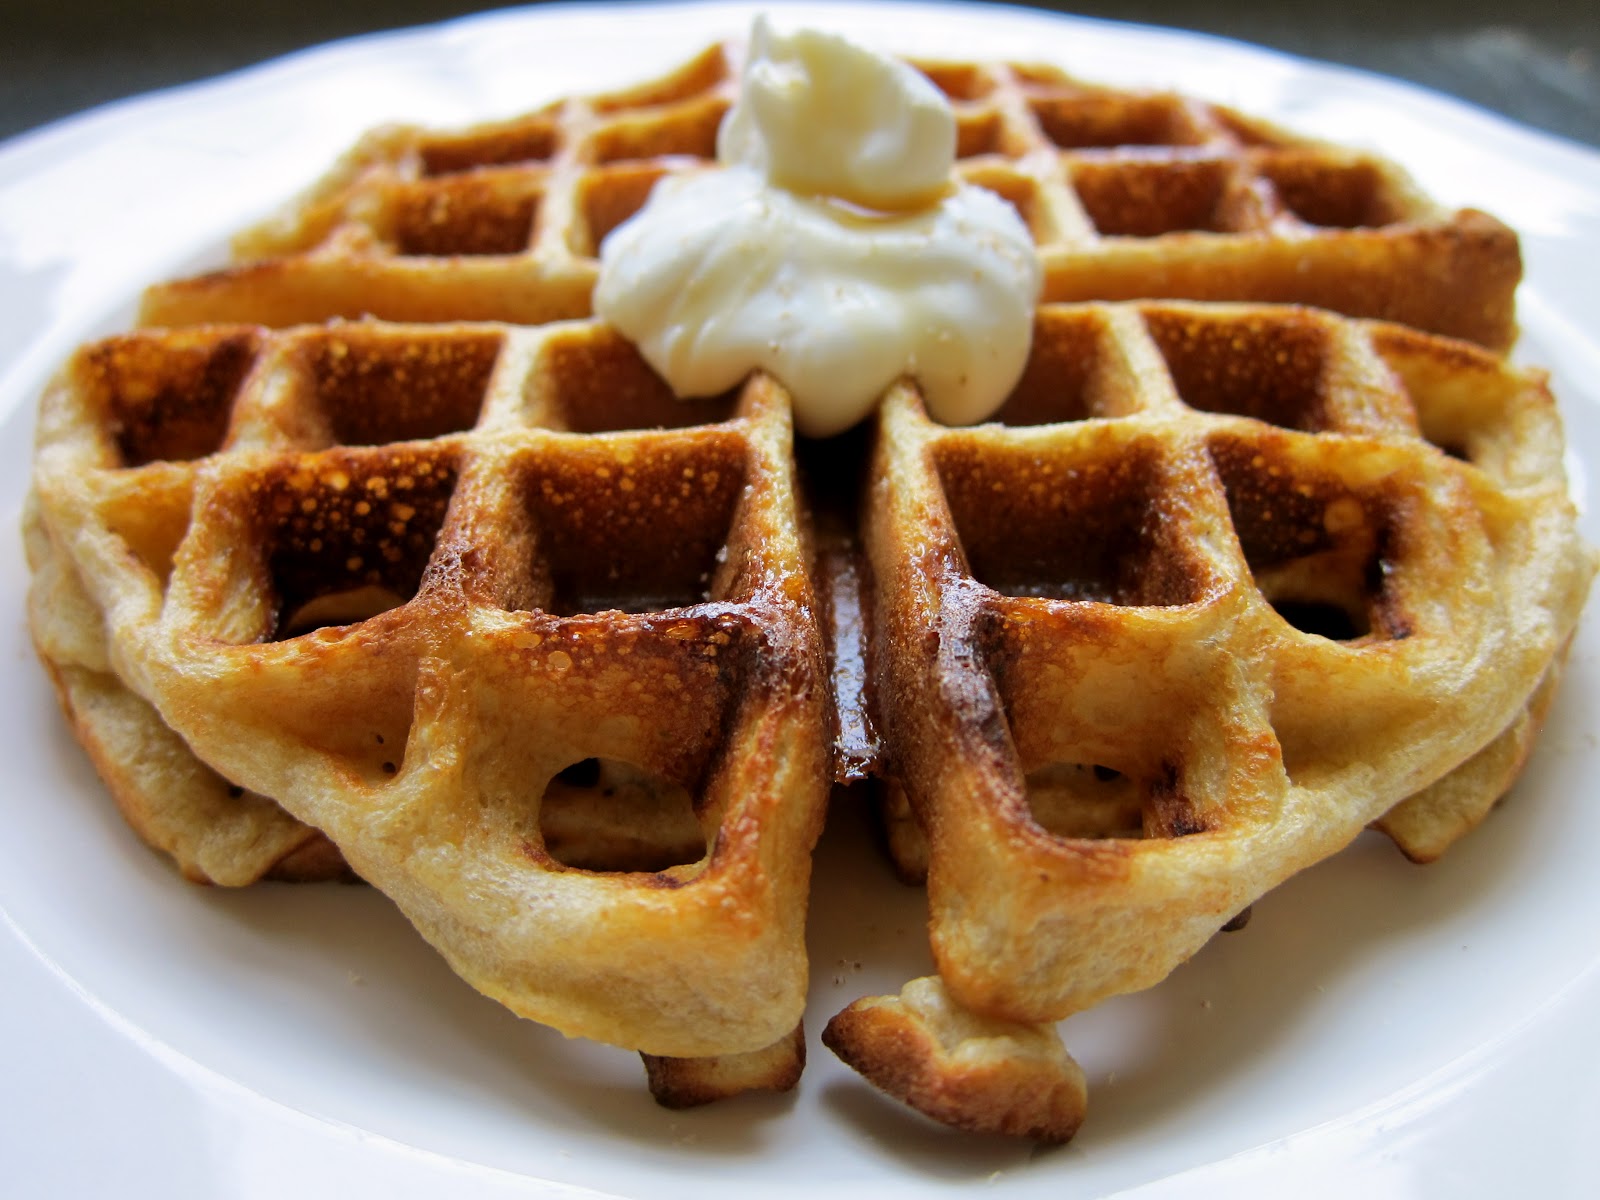
Overnight Buttermilk Buckwheat Waffles


Hello... (tap, tap)...  anybody there? You probably weren't expecting to hear from me after MONTHS of radio silence, and for that I apologize. I've missed NudeFood tremendously but can offer a few humble excuses. In May of 2011, knowing that we wanted to start a family, Tristan and I took the plunge and tied the knot. A few months later I became pregnant, and in September we left our beloved Capitol Hill apartment and bought a house in Queen Anne. A new job came my way in February because, you know, when it rains.  But the biggest, most significant change of all happened a mere 9 weeks ago. We welcomed our son, Maximo, to the world... and we are totally smitten.

While my hands are rather full at the moment, I do hope to make a semi-frequent online appearance from here on out. 


So without further ado, let's talk waffles. In my pre-pregnancy days, waffles weren't something I would typically order unless they had a piece of salty fried chicken on top. But all that changed around month six. If waffles were on the menu, that's what I was gettin'. However, I came to the sober realization that good waffles were hard to come by.  Either they were too soft, too thin, not toasty enough, too sweet or just too blah. I wanted a thick, crispy-on-the-outside-eggy-on-the-inside waffle with great flavor. Looked like I'd have to take matters into my own hands.

Enter this recipe... 


This method has so many things going for it. It starts with whole grains that get soaked overnight, and we all remember the magical benefits of soaking grains. Besides oats, buckwheat groats are added for a delicious layer of nuttiness. And instead of mixing in whole eggs, some of the whites are whipped separately and folded into the batter to produce exceptionally thick, fluffy waffles.


Warning: If you're looking for generic Eggo-type waffles, you'll be disappointed. But if you're in the market for a delicious and nutritious spin on an old classic, keep reading...


Overnight Buttermilk Buckwheat Waffles
I like to make extra waffles to freeze for a quick breakfast anytime. Just pop one in the toaster*, spread with peanut butter and top with banana slices.

1 1/3 cup steel cut oats
2/3 cup buckwheat groats
2 1/4 cup buttermilk**
3 tablespoons butter, melted
1/2 teaspoon kosher salt
2 tablespoons sugar, or to taste
1 1/2 teaspoon baking soda
3 eggs, 2 separated
1/2 teaspoon vanilla

Place steel cut oats, buckwheat groats and buttermilk into a blender, cover and refrigerate for 8 hours or overnight. In the morning, whiz the mixture until blended. Add the melted butter, salt, sugar to taste, baking soda, 1 whole egg, 2 egg yolks and vanilla. Blend until well mixed; pour batter into a mixing bowl. In a separate bowl, whip the remaining two egg whites until stiff peaks form. Using a rubber spatula, carefully fold the egg whites into the batter.

Cook waffles according to waffle maker instructions. For my Belgian iron, this meant brushing lightly with oil, ladling 3/4 cup batter onto the iron and cooking for about 3 minutes. Keep cooked waffles warm in a 200 degree oven until ready to eat. 


*If you plan on toasting frozen waffles, under-cook them just slightly in the waffle maker. They will brown a bit more in the toaster.


**If you don't have buttermilk, simply add 2 teaspoons of lemon juice or vinegar (white or apple cider) into the milk and allow to sit for 5 minutes. The mixture will thicken.

Sunday, September 18, 2011

Crispy Kale Chips


I’ve gotten a handful of kale chip questions lately. Kale chips are a snack I’ve made for years but never thought of as blog material. My mistake. They’re easy as pie to make and completely satisfy that crunchy, salty kind of craving. And if you’re someone who isn’t keen on the taste of leafy greens, this will change everything.

Kale is an unsung hero of sorts. It is one of the most nutritious foods you can possibly eat but doesn’t get nearly the attention it deserves. I’ve met a surprising number of people who only recognize it as that leafy salad bar decoration but wouldn’t have the slightest idea how to cook it. I have quite a few tasty ideas, but let’s start with the chips.


These are so simple you don’t even need a recipe. Wash a bunch of kale and strip the leaves from the fibrous stems (the stems have no place in the chip world; they won’t get crisp in the oven). Tear the kale leaves into large pieces and dry them really, really well. Place them on a parchment-lined baking sheet and drizzle with a bit of oil. Sprinkle with flaky kosher salt, toss well and spread out to form a single layer. It’s important not to overlap here – you might need to do this in batches. Bake in a 350°F oven for about 15 minutes or until the chips are dry and crisp.

You’ll be amazed at how delicious these are. Mine never last more than 10 minutes but if you can summon the willpower, save a few to crush over some freshly buttered popcorn. 


I’m somewhat of a purist so I like the clean flavor of lightly salted chips, but these would be the perfect vehicle for a multitude of spice combinations. Salt and vinegar, truffle, or chili garlic chips anyone?


Monday, May 9, 2011

Bagna Cauda


Crudités platters tend to bore me. Quite honestly I can't imagine anyone getting very excited over sticks of supermarket vegetables and "white dip," not to mention that serving raw cruciferous vegetables should be considered cruel and unusual punishment. Don't get me wrong, fresh veggies are a welcome addition to any party table but let's be honest, that same old, sorry tray just isn't bringing it.
 
Then about a month ago I was planning a dinner party that took on a Northern Italian theme. Instead of serving the usual green salad after the entree, I thought it would be fun to start the meal with bagna cauda, a Piedmontese crudités platter. I had read about it multiple times and thought that if anything could change my crudités attitude, it was this.
 
Bagna cauda literally means "warm bath." Garlic and anchovies are slowly warmed in olive oil until the salty fish dissolves and the oil is completely infused with flavor. It is then served in a dish over a candle (think fondue) with an assortment of raw and cooked vegetables for dipping. Although cardoons (a vegetable resembling celery but tasting of artichoke) and Jerusalem artichokes are traditional accompaniments, pretty much any seasonal produce can be used. 


In the Piedmont region of Italy, this fragrant dish was traditionally served as a warming snack in late Autumn and early winter to the chilled vineyard workers out pruning the vines. It tastes best, according to experts, with the new season's wine and a convivial atmosphere.
 
By the way, I now adore crudités platters.


Bagna Cauda
Some recipes emphasize the olive oil while others call for larger proportions of butter. This preparation uses both in a wonderful balance but can be tweaked to personal taste.
 
3/4 cup olive oil
8 cloves garlic, finely minced 

One 2-ounce can oil-packed anchovy fillets (about 12 fillets), chopped
3 tablespoons butter

Salt, if needed
Assortment of raw and blanched vegetables for dipping

In a small saucepan heat the olive oil, garlic and anchovies over medium-low for 6-8 minutes, whisking occasionally, until the anchovies have dissolved and the mixture looks muddy. Add the butter and whisk until melted. Taste and sprinkle in a bit of salt if necessary. Pour into a serving dish, ideally one that fits over a flame (but not necessary) and serve with crudites.

Wednesday, November 10, 2010

Truffled Popcorn with Rosemary and Parmesan


I come from a popcorn family. I’m not talking about people who enjoy a nice bowl, I’m talking popcorn enthusiasts.

My parents raised us without a television so our evening entertainment consisted of public radio (The Great Gildersleeve, Fibber McGee and Molly) and books. Lots of books. Every night we huddled on the sofa with a stack for mom to read, which nine times out of ten included The Popcorn Book by Tomie de Paola.

The story is about two brothers who look up the history of popcorn while making some for a snack. They find out that it originated with the Native Americans, who cooked it in clay pots or by holding corn cobs directly over the fire (they even made popcorn soup). They believed that a little demon lived inside each kernel and as things heated up he became so angry that he popped! In the meantime, the boys put way too many kernels in the pot and flood the kitchen with popped corn, which, I always thought as a kid, would be a wonderful mistake.

By the end of the book, we’d have one thing on our minds, and that’s when my mom would ask, “Who wants popcorn?” It’s no mystery why this was in our “favorites” rotation.

Nowadays I’m still a popcorn fanatic. Movies and sporting events aren’t worth watching without it. As for toppings, butter and salt will always be a classic but I also enjoy a good sprinkling of nutritional yeast or mixed herbs. My newest obsession, however, is truffle oil.

During our Balkan adventure two summers ago, Tristan and I bought a bottle of local truffle oil at the farmers’ market in Rovinj, Croatia, and ever since we’ve been indulging in truffled popcorn. Melted butter, truffle oil, a little kosher salt – it doesn’t get much better than that.


And then the other day I picked up Donatella Arpaia’s new cookbook, Donatella Cooks, where she suggests a combination of fresh rosemary, truffle oil and pecorino cheese. I love this woman! So I whipped up a batch and brought it to the Seattle Sounders soccer game. Let’s just say that I don’t think I can go back to the stadium kettle corn again.

I barely needed an excuse to make popcorn as it was. Now I’m struggling to find an excuse not to.

~ Dedicated to my mother


Truffled Popcorn with Rosemary and Parmesan
Great for movie night or game day. I’m simply listing the ingredients here; exact amounts depend on how much popcorn you’d like to make. Keep in mind that the melted butter and truffle oil ratio should be 1 to 1. Adapted from Donatella Cooks.

High heat vegetable oil
Popcorn kernels
Melted butter
Truffle oil (white or black)
Salt
Fresh ground pepper
Fresh rosemary, finely chopped
Grated Parmesan cheese

Pour a thin film of oil over the bottom of a heavy bottomed pan. Add the popcorn kernels in one layer, cover tightly and set over medium-high heat. When the popping begins, take the pan by the handles and shake often to keep things moving and to prevent burning. When the popping slows, turn off the heat. Once popping is completed, carefully remove the lid and transfer the popped corn to a large bowl.

I like to do this part in stages. Drizzle some of the melted butter and truffle oil mixture (remember, they are in a 1:1 ratio) over the popcorn, then sprinkle lightly with salt, pepper, rosemary and Parmesan. Toss a bit and repeat as many times as needed; be sure to taste as you go!

Tuesday, February 16, 2010

Mini Soft Pretzels


Ever since I saw Deb’s post on miniature soft pretzels, I’ve been looking for a good excuse to make them. Then football season rolled around. 
 
So when Emily and Erik came over to watch a playoff game a few weeks back, I was on it. Besides the usual suspects -- crackers and cheese, roasted peanuts in their shells, chips and salsa -- I wanted to offer a big tray of salty, hot pretzels ready to be doused in mustard. 

 
The dough was easy enough, and the rolling out and making of proper knots took only a few tries to master. But I did learn a thing or two. First of all, even if you use parchment paper, oil it. Those suckers stick to it like nobody’s business, and having to forcefully pull them off deforms their delicate little shapes. Secondly, kosher salt isn’t coarse enough. I thought it would hold up but it immediately dissolved into the egg wash. If you, like most people, don’t have authentic pretzel salt lying around, a large, coarse sea salt will do nicely.


Since there were only 4 of us, I decided to freeze half the dough (portioned out but not rolled or formed). So when we were invited to a friend’s house to watch the Super Bowl a week or so later, my contribution was quick and easy. The dough defrosted in the refrigerator in a matter of hours and behaved exactly as if it were fresh. Next time I'd like to fashion it into little buns for pretzel dot sandwiches like the ones I had at Licorous last year (prosciutto, Gruyere, sauerkraut and a grainy mustard sauce). 
 
These are a bit laborious but the results, paired with a frosty beer, are well worth it.